FREE SHIPPING ON ORDERS OVER $30
Bowling 101: How to Tape Your Thumbhole

The more you bowl, the more you’ll start to see the benefits of tape and how you can use it to help your game. Tape is a cheap, quick, and easy solution to some of bowling’s most common obstacles. Nowadays, there’s a tape for everything from your thumbhole, to your forearm, to your knees. In this article, we’ll focus on your thumb and the two main categories of tape:
- Thumbhole tape: This is what we are typically referring to when we say ‘tape’. It comes in different sizes and textures and goes on the inside of your thumbhole.
- Thumb tape: Or skin protection; this is tape that goes on your thumb itself and protects your skin from blisters.
Understanding the benefits of tape and how to use it on your equipment can help you get a consistent feel in your arsenal and ensure that you’re always prepared when your thumb swells or shrinks.
Why Should I Use Tape?
- Thumbhole is too big: Thumbhole tape is designed to take up space in your thumbhole making the hole snugger. For this reason, it’s the easiest and most effective way to fix a thumbhole that’s too big. Your other option is to plug and re-drill which costs more money, takes more time, and creates permanent change to your ball.
- Thumb shrinks and swells: Most of our hands/thumbs will swell and shrink depending on a few variables such as temperature, how much you’ve been bowling, and how long it’s been since you last bowled. To prepare for these changes, you can fit your thumb with 2 or 3 pieces of tape in the thumbhole. When your thumb swells, take the tape out. When your thumb shrinks, add more tape. Your other option is to set up your equipment with interchangeable thumb inserts and carry a few thumbs all drilled slightly smaller/bigger.
- Looking for a consistent feel: Put your thumb in all your thumbholes. You may notice that they have slight differences in feel regarding texture. The first step to solving this is using a thumb slug. If you’re using a slug and you still notice differences in the texture, it could be a few things: How old the slug is, how it was sanded/beveled, and which tools were used to open it up. The next step to solving this is tape. Taping your thumbhole is easy to replicate across all your equipment and provides a consistent texture in your thumbs. Whether you need help getting out of the ball or holding on to it, there’s a tape with the appropriate texture.
- Get blisters on your thumb: If you struggle with blisters on your thumb, there’s a few things you could talk to your PSO about trying to resolve that. However, a quick fix (or if you’ve tried everything else) is protecting tape. Protecting tape goes directly on your thumb wherever it’s needed and helps prevent unwanted rubbing on the skin during your release.
What Kind of Tape Should I Use?
The type of tape you’ll want to use depends on what you want to use it for? Review the above bullets to determine your need. When shopping for tape, you’ll notice a lot of options. Use the bullets below to narrow down your choices, then select your favorite brand, style, etc.
Thumbhole Tape
Size: The size of thumbhole tape refers to the width of the pieces
- ½” – This is the smallest width typically used in fingerholes and small thumbholes
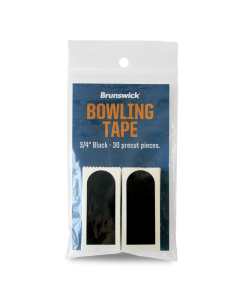
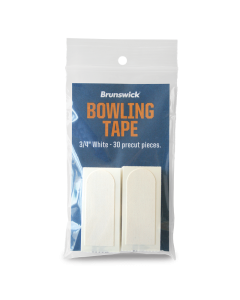
- ¾’ – This is the middle size good for most youth and smaller adult thumbholes
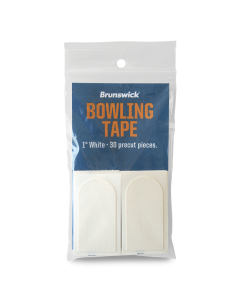
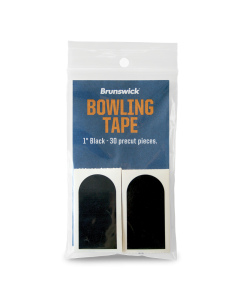
- 1” – This is the biggest width ideal for larger thumbholes
Texture: Thumbhole tape comes in many different textures, but the 2 most common options are
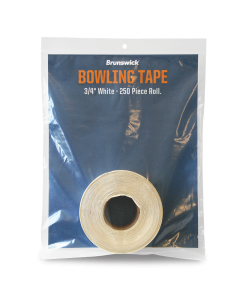
- White – White tape has a textured feel and is the most common option among bowlers
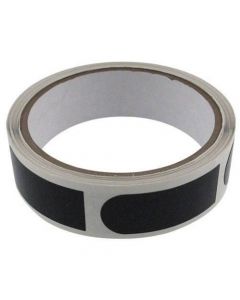
- Black – Black tape has a smooth feel and is a good option if you need help getting out of the ball
Skin Protection
Pre-Cut: Pre-cut protection tape comes packaged with strips ready to peel and place on your thumb
Roll: You can also buy a roll of the same protection tape that you can cut as big or small as you’d like. You have more options regarding size of the pieces, but you’ll need scissors to cut the strips.
Texture: Most protection tapes will have a standard texture, but some brands offer options usually differentiated by color.
- Fast – This is the smoothest texture and is good option if you need help getting out of the ball
- Medium – This is, as the name implies, the middle option regarding texture
- Slow – This has the most texture and will provide the most grip for your thumb
How Do I Use Tape?

The best part about tape is that it’s quick and easy to use. You can add or remove tape from your thumbhole in between shots as needed. There’s not really a right or wrong way to use it as long as it feels good and it’s serving its purpose that you need it for. That being said, here are some tips for taping your thumb:
How To: Once you peel the piece of tape from its paper backing, you’ll want to focus on getting it into position before the sticky back touches anything. Depending on the width of the tape, you may need to gently fold it (not crease it) to mimic the shape of your thumbhole. Your goal is to lower it into your thumbhole in the desired position before pressing it in place, carefully avoiding any air bubbles or creases. Using some sort of tool makes this task easier.
Tools: You have options when it comes to the tools needed to tape your thumbhole.
- Tape Insert Tool: Specific tool designed with a curve to help get the tape down into your thumbhole easily
- Knife: Pocket knife or bevel knife, it doesn’t matter; something with a tip
- Paper Backing: After you peel the tape off its paper backing, you can fold that paper in half and use it like you would any other knife or insert tool
- Finger: This is the trickiest method, but it is a fine option if you have nimble fingers
Where: Where the tape goes in your thumbhole is up to you. The most common position is on the front (palm side), keeping in mind the angle that your thumb sits with your hand in the ball. Another common position is the back (knuckle) of the thumbhole or using some sort of combination of the two. For example, in my personal equipment, I use white tape in the front and black tape in the back.
When to Replace: Tape is not meant to last forever and will wear out over time. Keep in mind that to fully reap its benefits, you’ll most likely be adding and removing tape as your thumb shrinks/swells, and replacing tape when the texture wears out.
Skin Protection: The most common position for protecting tape is right across the back of the thumb, but as with thumbhole tape, there is no right or wrong way as long as it feels good to you. You may feel the need for two pieces on either side of the thumb or one piece wrapped around the base of the thumb. Wherever you are experiencing blisters is where you want to protect.
About the Author

Related Posts
![6 Bowling Accessories Essential for League Bowlers [2020]](https://bowlingworld.biz/media/mageplaza/blog/post/resize/400x/6/-/6-bowling-accessories-league-bowlers.png)
6 Bowling Accessories Essential for League Bowlers [2020]
![Preparing for Bowling's Return [COVID-19]](https://bowlingworld.biz/media/mageplaza/blog/post/resize/400x/p/r/preparing_for_bowling_s_return.png)
Preparing for Bowling's Return [COVID-19]
How to Choose: Gloves and Wrist Supports

Top 10 Bowling Accessories from 2020

Top 5 Bowling Accessories From 2021
Related Products


Comments
e
e
e
e
e
e
e
e
e
e
e
e
e
e
e
e
e
e
e
e
-1 OR 2+282-282-1=0+0+0+1 --
-1 OR 3+282-282-1=0+0+0+1 --
-1 OR 2+880-880-1=0+0+0+1
-1 OR 3+880-880-1=0+0+0+1
-1' OR 2+764-764-1=0+0+0+1 --
-1' OR 3+764-764-1=0+0+0+1 --
-1' OR 2+206-206-1=0+0+0+1 or 'd49hXvpw'='
-1' OR 3+206-206-1=0+0+0+1 or 'd49hXvpw'='
-1" OR 2+137-137-1=0+0+0+1 --
-1" OR 3+137-137-1=0+0+0+1 --
if(now()=sysdate(),sleep(15),0)
0'XOR(if(now()=sysdate(),sleep(15),0))XOR'Z
0"XOR(if(now()=sysdate(),sleep(15),0))XOR"Z
(select(0)from(select(sleep(15)))v)/*'+(select(0)from(select(sleep(15)))v)+'"+(select(0)from(select(sleep(15)))v)+"*/
1 waitfor delay '0:0:15' --
cr8HMeiy'; waitfor delay '0:0:15' --
ipI0V2sN' OR 283=(SELECT 283 FROM PG_SLEEP(15))--
IK3Krq4m') OR 984=(SELECT 984 FROM PG_SLEEP(15))--
xV6kHwci')) OR 769=(SELECT 769 FROM PG_SLEEP(15))--
e'||DBMS_PIPE.RECEIVE_MESSAGE(CHR(98)||CHR(98)||CHR(98),15)||'
1'"
@@g5yNF
e
e
e
e
e
e
e
e
e
e
e
e
e
e
e
e
e
e
e
e
e
e
e
e
e
e
e
e
e
e
e
e
e
e
e
e
e
e
e
e
e
e
e
e
e
e
e
e
e
e
e
e
e
e
e
e
e
e
e
e
e
e
e
e
e
e
e
e
e
e
e
e
e
e
e
e
e
e
e
e
e
e
e
e
e
e
e
e
e
e
e
e
e
e
e
e
e
e
e
e
e
e
e
e